Arduino RC Car with Android Control via Bluetooth
This tutorial goes through setting up the Arduino IDE for use with an Adafruit motor shield clone board as well as setting up an old RC car so that it can be controlled with an android phone via bluetooth. Code credit goes to Bill Tarpy (It was only slightly modified in order to work with my particular RC car setup. Download the Adafruit Motor Shield Library here:
https://learn.adafruit.com/adafruit-motor-shield/library-install
//---------------------------------------------------------------------------------------------------------------------------------------
//Basic Remote Control Car - Bill Tarpy - North East CoderDojo  17/01/2015
//Feel free to use this software as a basis for your own.
#include <SoftwareSerial.h> //the library for seial communication
#include <AFMotor.h> // the library for the Adafruit L293 Arduino Motor Shield
int incomingByte = 0; // for incoming serial data
int speed_min = 135; //the minimum "speed" the motors will turn - take it lower and motors don't turn
int speed_max = 255; //the maximum "speed" the motors will turn – you can’t put in higher

int speed_left = speed_max; // set both motors to maximum speed
int speed_right = speed_max;

//as we added a Motor Shield Library we can just use the following code to define our M1 and M2 motors and their PWM frequency
//the library takes care of all the complexity of the physical interface the Arduino uses to talk to the shield and the motor
AF_DCMotor motor_left(1, MOTOR12_1KHZ); // create motor #1, 1KHz pwm
AF_DCMotor motor_right(4, MOTOR12_1KHZ); // create motor #2, 1KHz pwm

void setup() {
Serial.begin(9600); // set up Serial library at 9600 bps - this is the speed the serial interface will work at
Serial.println("Motor test!");// display message for test purposes when connected to a serial monitor
}

void loop() {
  //this is our repeating loop - that will go round and round until we switch the Arduino off
  motor_left.setSpeed(speed_left); // minimum speed 135   max speed 255
motor_right.setSpeed(speed_right); // minimum speed 135   max speed 255

//first check if there is anything on the serial interface
//we are using the Arduino's default serial interface (pins 0 and 1)so no need to define these
    if (Serial.available() > 0) {
    // read the incoming byte:
    incomingByte = Serial.read();
    }

  // if there is something on the serial interface it is read and assigned to incomingByte
  // we then use a SWITCH (case) statement which, depending on incomingByte, does different things
  // it runs the left and right motors to produce movement Forward, Backward, Left, Right or Stop
  //that's all there is to it!

  switch(incomingByte)
  {
     case 'S':
         // stop all motors
      { motor_left.run(RELEASE); // stopped
       motor_right.run(RELEASE); // stopped
       Serial.println("Stop\n"); //display message for test purposes when connected to a serial monitor
       incomingByte='*';}

     break;

     case 'F':
       // turn it on going forward
     {  motor_left.run(FORWARD);

       Serial.println("Forward\n");//display message for test purposes when connected to a serial monitor
       incomingByte='*';}
     break;

      case 'B':
        // turn it on going backward
    {   motor_left.run(BACKWARD);

       Serial.println("Backward\n");//display message for test purposes when connected to a serial monitor
       incomingByte='*';}
     break;

     case 'R':
     // turn right
     {
       motor_right.run(FORWARD);
       Serial.println("Rotate Right\n");//display message for test purposes
       incomingByte='*';}
     break;


       case 'L':
        // turn left
      {
       motor_right.run(BACKWARD);
       Serial.println("Rotate Left\n");//display message for test purposes
       incomingByte='*';}
     break;

     case '1':
        // Put what you like in here - for example - change the motor speeds
      { speed_left = speed_min; // set both motors to minimum speed
       speed_right = speed_min;
       Serial.println("Speed 1\n");//display message for test purposes
       incomingByte='*';}
     break;

    case '2':
        // Put what you like in here - for example - turn on some LED lights on the car
      {
       Serial.println("Lights on\n");//display message for test purposes

       //why not use the motor sheild's spre motors - M3 and M4  - to turn lights on and off
       //you would need to define M3/4 in your program setup, and a few extra veriables to hold values
       //then FORWARD and BACKWARD would send a voltage one way then the other through the M3 and M4 terminals as you require

       incomingByte='*';}
     break;
  }
}
//-----------------------------------------------------------------------------------------------------------------------
Parts
Links to Android Controlled RC Car Robot Parts -- All Parts below were sourced from China
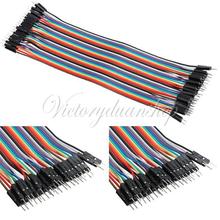 40 Piece Jumper Wires $1.59
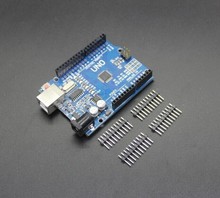 Arduino Uno $3.59 (unofficial version from China)
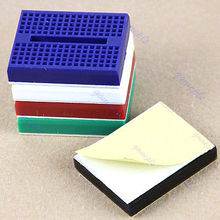 Mini-Breadboard $1.18
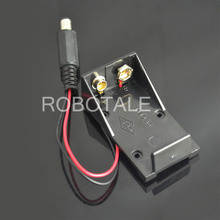 9V Battery Holder with Plug for Arduino $4.15 (Sorry could not find a cheap one that included an On/Off Switch, this was the best I could do. See product below for solution...)
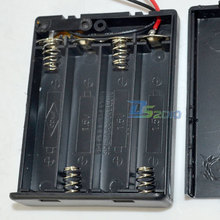 4 AAA battery holder INCLUDES ON/OFF SWITCH!! $1.11
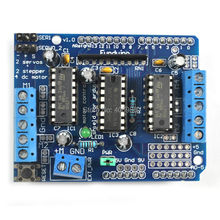 Arduino Uno Motor Shield $3.20
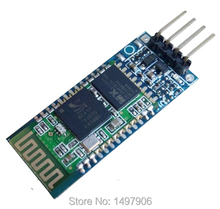 Arduino Bluetooth Module $4.60
Hey !!!
about us (me).
My name is Matthew, I am 26, and I attend the University of Pittsurgh. Currently I am a junior, going for a bachelors in Information Science. I am always looking for someone that would like to embark on a new project or startup. I work as a food server when I am not at school, but would love something a little more technical, if anyone is hiring.
- Pittsburgh, PA
- MatthewHallberg@gmail.com